> ## Documentation Index
> Fetch the complete documentation index at: https://docs.agentmark.co/llms.txt
> Use this file to discover all available pages before exploring further.
# Create a prompt
> Create prompts in the Dashboard visual editor or as local .prompt.mdx files
### 1. Create a prompt
Open the create menu in the Dashboard to start a new prompt.
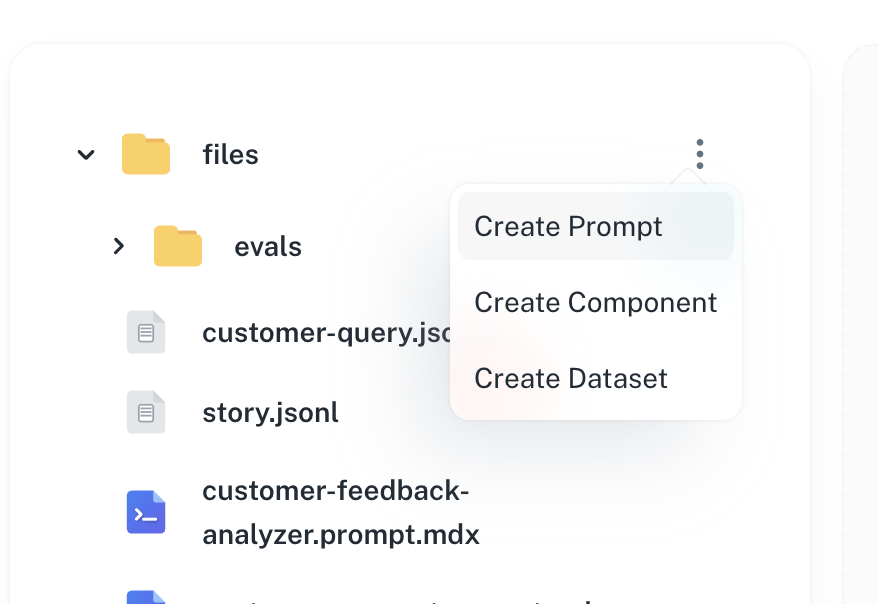 The **Create** menu in the top bar lets you add a new prompt, dataset, or component to the current app.
### 2. Name your prompt
Give your prompt a descriptive name and choose the generation type (Text, Object, Image, or Speech).
The **Create** menu in the top bar lets you add a new prompt, dataset, or component to the current app.
### 2. Name your prompt
Give your prompt a descriptive name and choose the generation type (Text, Object, Image, or Speech).
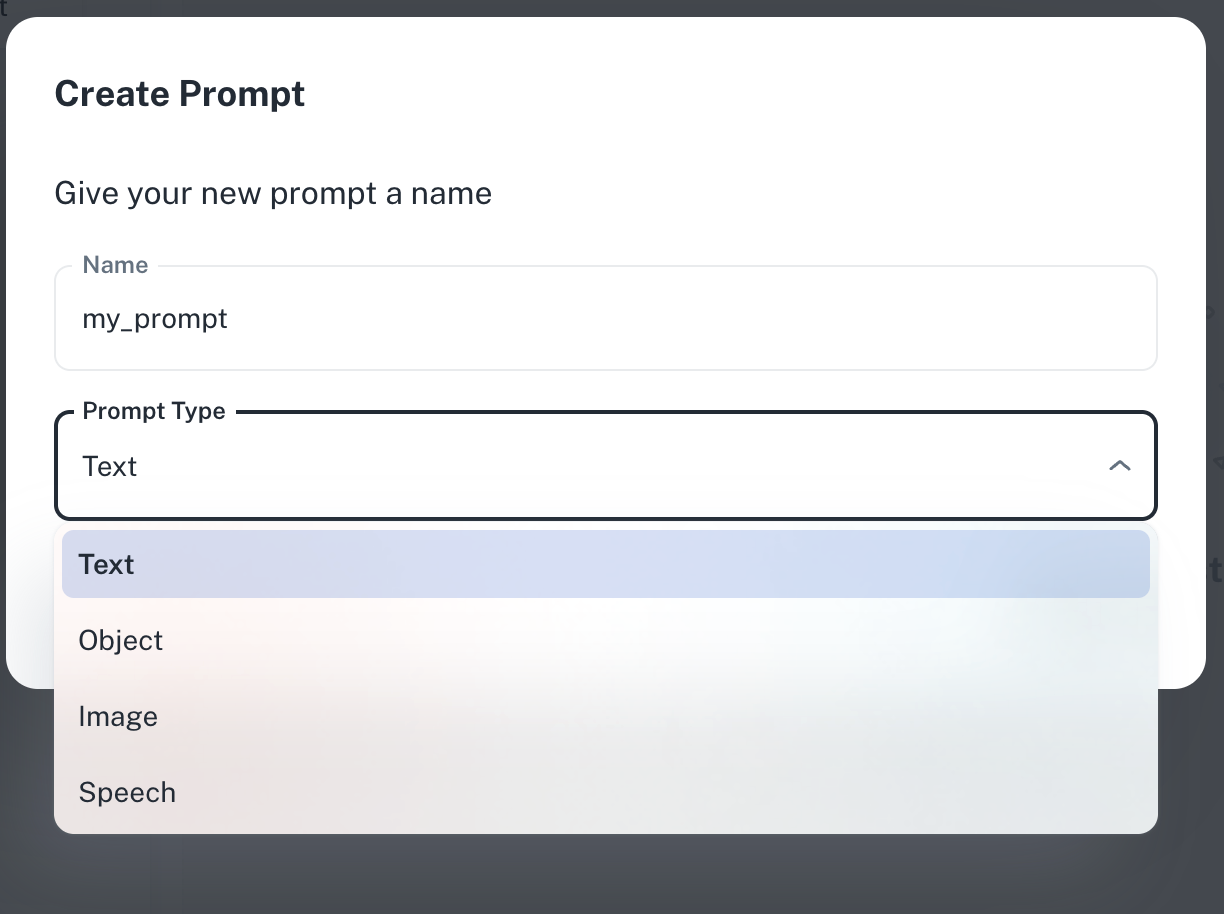 The new-prompt dialog takes a name (used as the filename under `agentmark/`) and a generation type (**Text**, **Object**, **Image**, or **Speech**), which determines the frontmatter config key and supported message tags.
### 3. Write your prompt
Select your model and write your prompt using message tags.
The new-prompt dialog takes a name (used as the filename under `agentmark/`) and a generation type (**Text**, **Object**, **Image**, or **Speech**), which determines the frontmatter config key and supported message tags.
### 3. Write your prompt
Select your model and write your prompt using message tags.
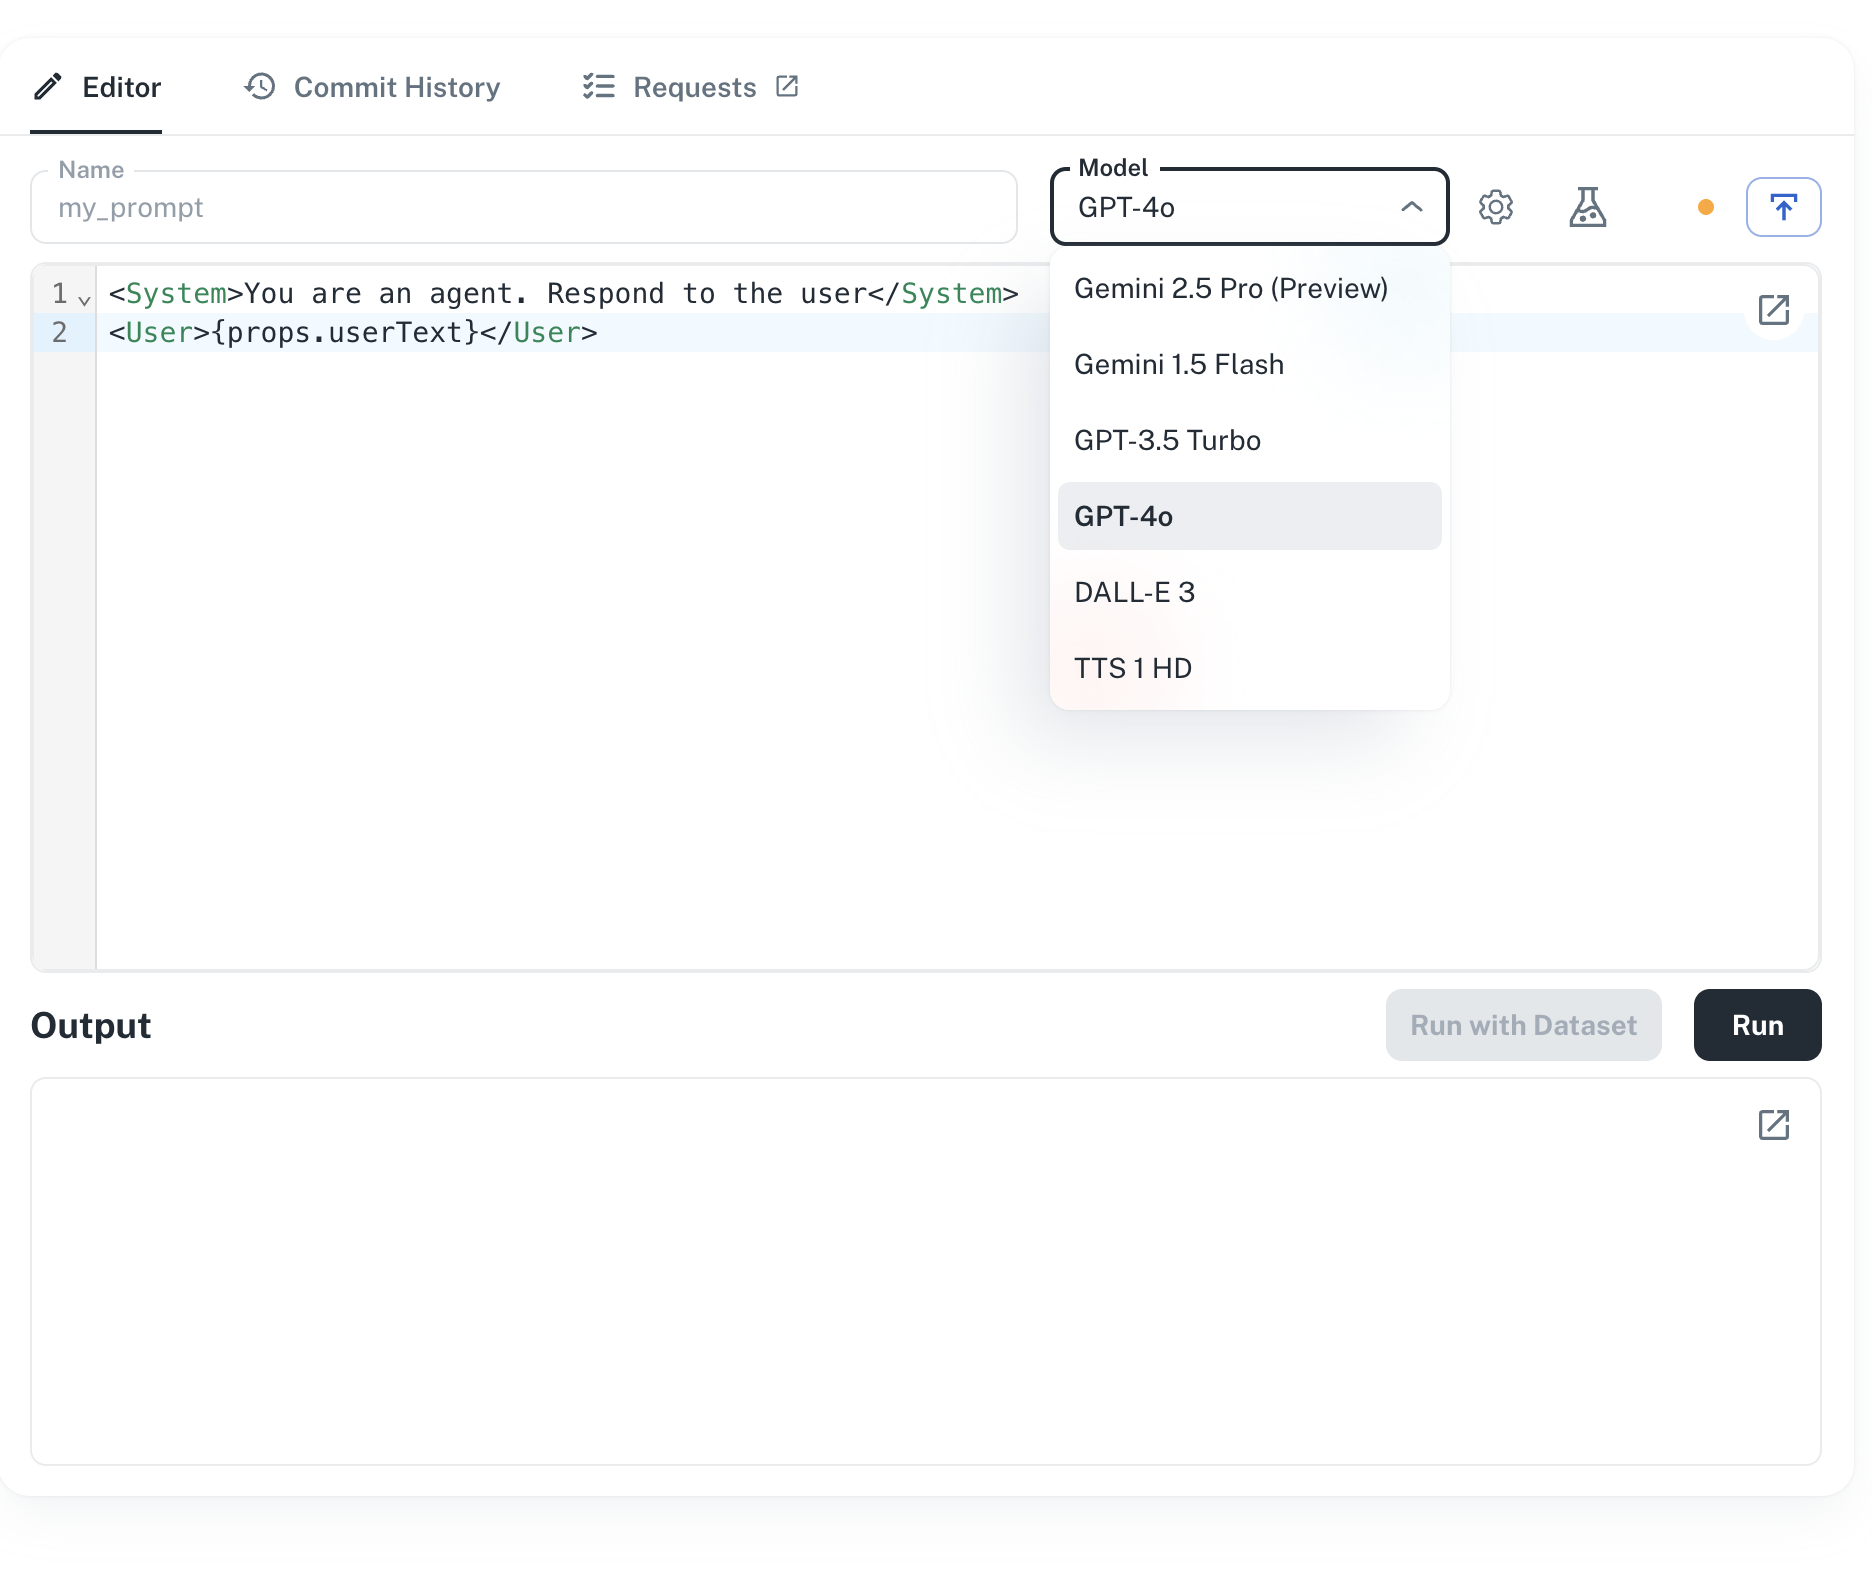 The editor has a model selector, frontmatter for config (model, temperature, etc.), and a message-tag editor for the prompt body (``, ``, ``). Syntax highlighting and inline validation help catch frontmatter or tag errors as you type.
### 4. Run your prompt
Add your input variables and run the prompt to see results.
Fill the input-variable fields (any `{props.foo}` references in your prompt), then click **Run** to execute the prompt. The output streams into the right panel in real time.
### 5. Publish
Publish to save your changes and make them available to your application.
The editor has a model selector, frontmatter for config (model, temperature, etc.), and a message-tag editor for the prompt body (``, ``, ``). Syntax highlighting and inline validation help catch frontmatter or tag errors as you type.
### 4. Run your prompt
Add your input variables and run the prompt to see results.
Fill the input-variable fields (any `{props.foo}` references in your prompt), then click **Run** to execute the prompt. The output streams into the right panel in real time.
### 5. Publish
Publish to save your changes and make them available to your application.
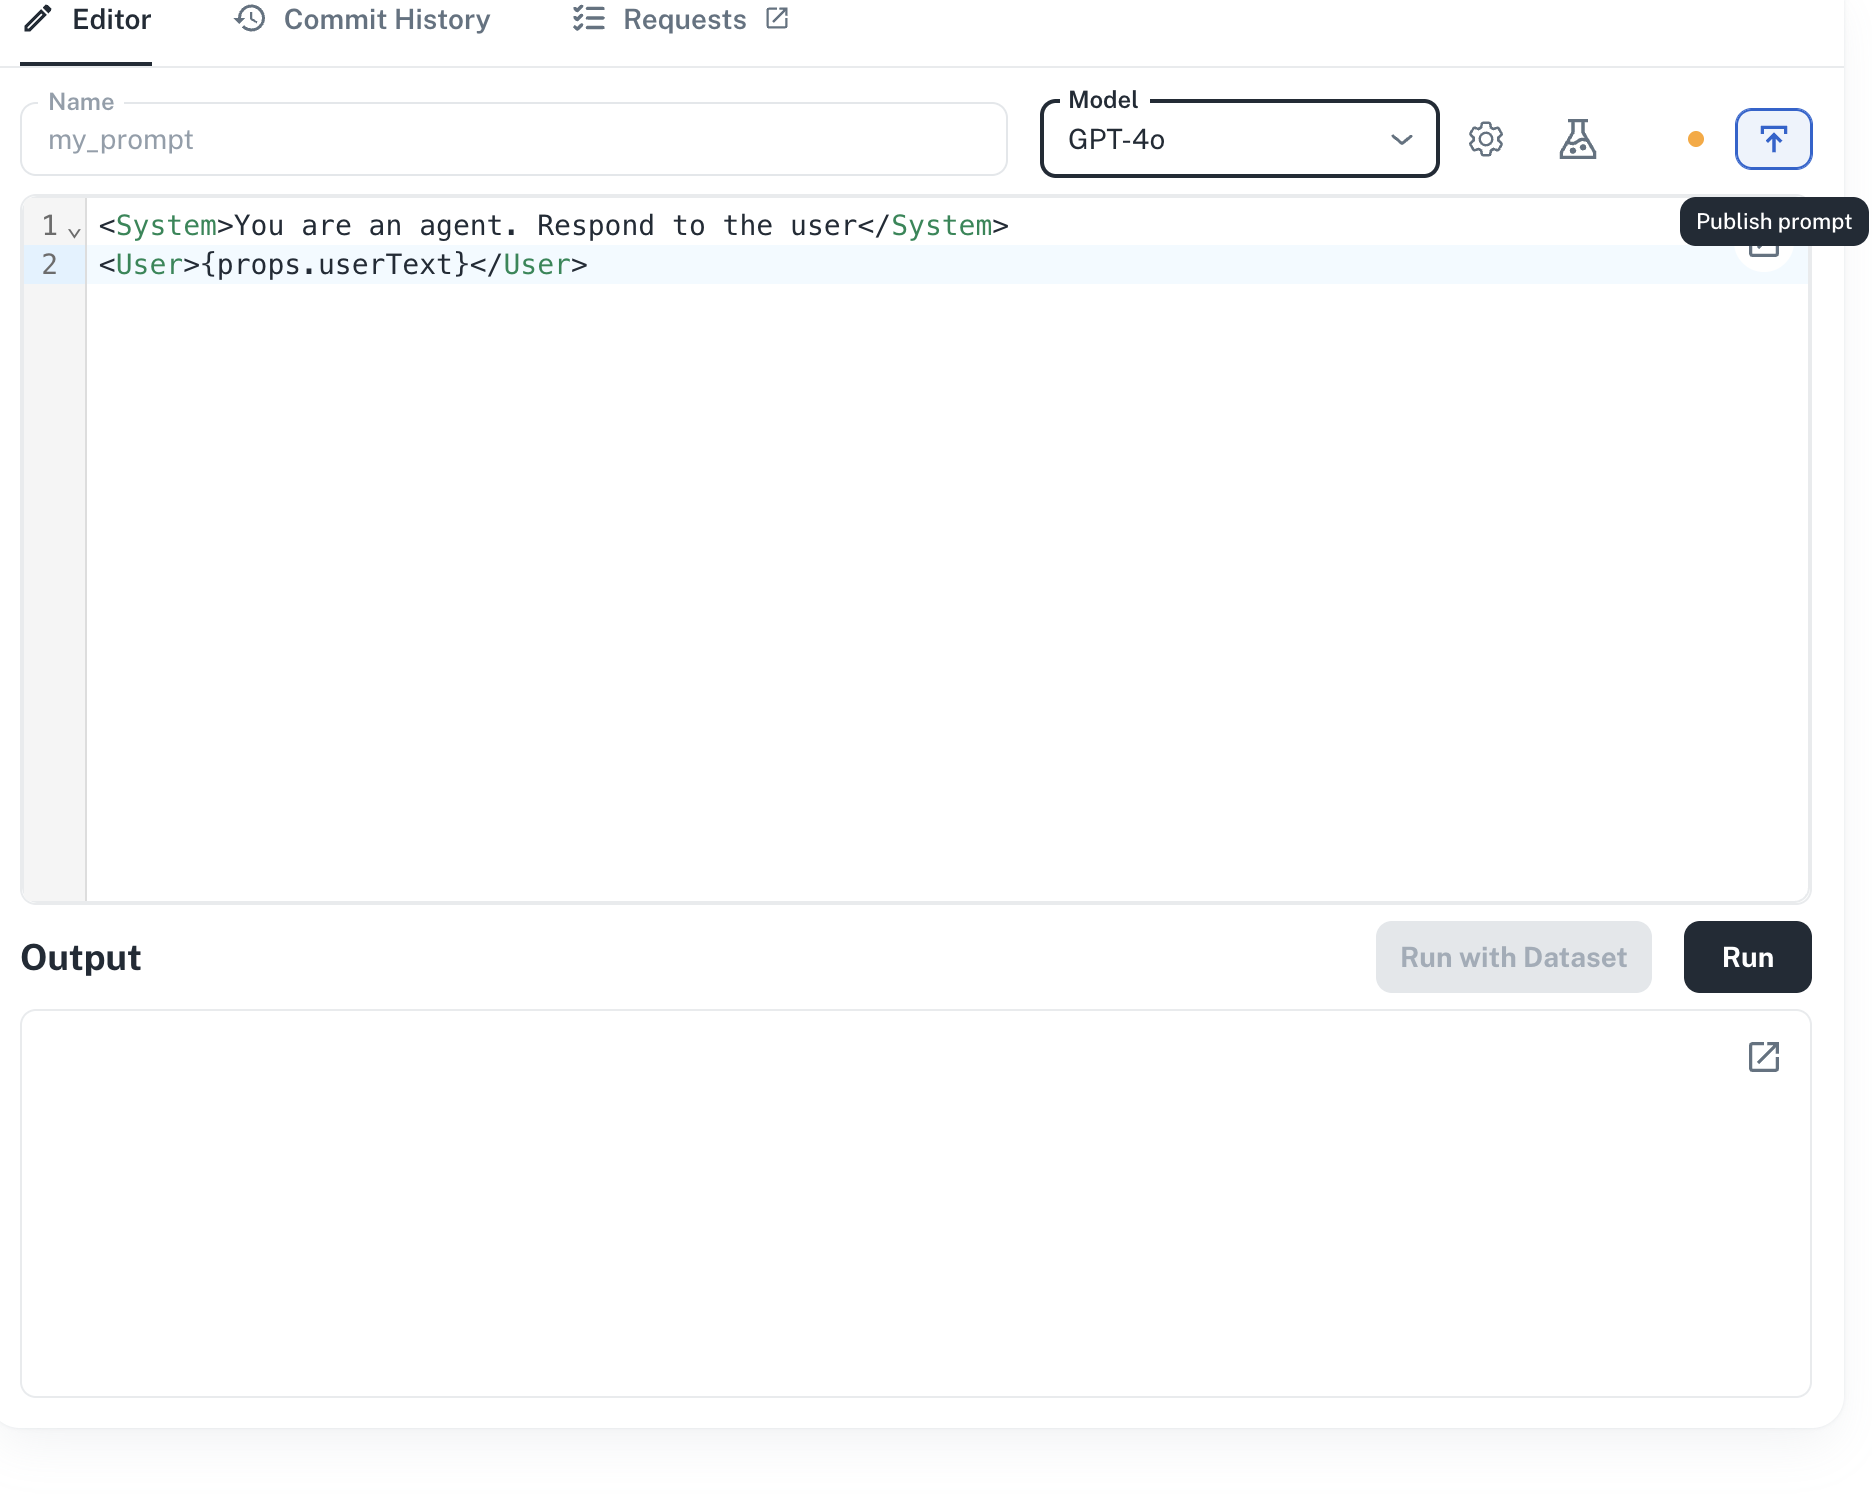 The **Publish** button commits your edits to the app's default Git branch and makes the new version available to your application via the SDK or CLI.
Every change is automatically versioned. You can view the full version history, compare changes between versions, and rollback to any previous version from the Dashboard. See [Version control](/build/version-control) for details.
### 1. Create a `.prompt.mdx` file
Add a new file in your project's `agentmark/` directory:
```mdx agentmark/greeting.prompt.mdx theme={null}
---
name: greeting
text_config:
model_name: openai/gpt-5-mini
temperature: 0.7
---
You are a friendly assistant.
Say hello to {props.name} and tell them something interesting.
```
### 2. Choose a generation type
The frontmatter key determines the output type:
| Key | Output | Tags |
| --------------- | --------------- | ----------------------------------- |
| `text_config` | Text response | ``, ``, `` |
| `object_config` | Structured JSON | ``, ``, `` |
| `image_config` | Image | `` |
| `speech_config` | Audio | ``, `` |
[Learn more about generation types →](/build/generation-types/overview)
### 3. Run your prompt
```bash theme={null}
agentmark run-prompt agentmark/greeting.prompt.mdx
```
Requires the development server running (`agentmark dev`).
Or run it from your application code. See [Running prompts](/build/running-prompts).
### 4. Iterate
Edit the file, save, and run again. With the dev server running, changes are picked up automatically.
Your prompts are version-controlled in git alongside your code. When synced to Cloud, every change is tracked with full history and rollback. See [Version control](/build/version-control) for details.
## Next steps
Execute prompts from your application via SDK
Compare models and prompts side-by-side
Text, object, image, and speech output
Variables, conditionals, loops, and components
The **Publish** button commits your edits to the app's default Git branch and makes the new version available to your application via the SDK or CLI.
Every change is automatically versioned. You can view the full version history, compare changes between versions, and rollback to any previous version from the Dashboard. See [Version control](/build/version-control) for details.
### 1. Create a `.prompt.mdx` file
Add a new file in your project's `agentmark/` directory:
```mdx agentmark/greeting.prompt.mdx theme={null}
---
name: greeting
text_config:
model_name: openai/gpt-5-mini
temperature: 0.7
---
You are a friendly assistant.
Say hello to {props.name} and tell them something interesting.
```
### 2. Choose a generation type
The frontmatter key determines the output type:
| Key | Output | Tags |
| --------------- | --------------- | ----------------------------------- |
| `text_config` | Text response | ``, ``, `` |
| `object_config` | Structured JSON | ``, ``, `` |
| `image_config` | Image | `` |
| `speech_config` | Audio | ``, `` |
[Learn more about generation types →](/build/generation-types/overview)
### 3. Run your prompt
```bash theme={null}
agentmark run-prompt agentmark/greeting.prompt.mdx
```
Requires the development server running (`agentmark dev`).
Or run it from your application code. See [Running prompts](/build/running-prompts).
### 4. Iterate
Edit the file, save, and run again. With the dev server running, changes are picked up automatically.
Your prompts are version-controlled in git alongside your code. When synced to Cloud, every change is tracked with full history and rollback. See [Version control](/build/version-control) for details.
## Next steps
Execute prompts from your application via SDK
Compare models and prompts side-by-side
Text, object, image, and speech output
Variables, conditionals, loops, and components
Have questions?
Reach out any time: