> ## Documentation Index
> Fetch the complete documentation index at: https://docs.agentmark.co/llms.txt
> Use this file to discover all available pages before exploring further.
# Quickstart
> Create an AgentMark project and run your first prompt. Your AI editor does the wiring.
`agentmark init` scaffolds the project: it writes `agentmark.json`, creates an empty `agentmark/` directory, pins `@agentmark-ai/cli` as a local dev dependency (so CI and teammates run the same version), installs the [AgentMark agent skill](/coding-agents/agent-skill) into your editor, and hands off to your AI tool. The AI tool reads your project, asks the docs MCP for the right integration pattern, and wires the SDK into your existing code.
## Prerequisites
* Node.js 18+
* An AI-tool-aware editor: [Claude Code](https://code.claude.com), [Cursor](https://cursor.com), [VS Code](https://code.visualstudio.com/) (Copilot Chat), or [Zed](https://zed.dev)
* An LLM provider API key (OpenAI, Anthropic, etc.) for the model you want to run
## Step 1: Install the CLI
Install once, globally, so the bare `agentmark` command is on your PATH:
```bash theme={null}
npm install -g @agentmark-ai/cli
```
## Step 2: bootstrap
Run from inside your project directory (or pass a folder name to scaffold a fresh one):
```bash theme={null}
agentmark init
```
Prefer not to install globally? `npm create agentmark@latest` (also `yarn create agentmark` / `pnpm create agentmark`) is a thin wrapper that runs the exact same `agentmark init` flow and produces identical output.
The CLI asks two short questions, scaffolds, and exits:
```text theme={null}
? Where would you like to set up AgentMark? .
? Wire AgentMark MCP into which IDE clients?
Space to toggle. Enter to submit. Skip all = empty selection.
◉ Claude Code
◉ Cursor
◉ VS Code
◉ Zed
✅ agentmark.json
✅ agentmark/ (empty, ready for your .prompt.mdx files)
✅ package.json (@agentmark-ai/cli ^0.15.0 + scripts: dev, agentmark:build, agentmark:experiment)
✅ MCP wired (Claude Code): .mcp.json
✅ MCP wired (Cursor): .cursor/mcp.json
✅ MCP wired (VS Code): .vscode/mcp.json
✅ MCP wired (Zed): .zed/settings.json
📚 Installing AgentMark agent skill...
✅ Agent skill installed at ./.agents/skills/agentmark/
✨ AgentMark is wired up.
Next: open this project in Claude Code, Cursor, VS Code, or Zed and say:
"Set up AgentMark in this project."
```
The local pin means `npm run dev` (and CI) resolve the pinned `@agentmark-ai/cli` from `node_modules/.bin` before any global install, so your project always builds against the version it was scaffolded with. In an existing project that already has a `dev` script, the AgentMark scripts land under namespaced keys (`agentmark:dev`, …) instead of clobbering yours.
**Non-interactive (CI / scripting):**
```bash theme={null}
agentmark init my-app --client all --overwrite
```
Flags: `--path ` • `--client ` (ids: `claude-code`, `codex`, `cursor`, `vscode`, `zed`; comma-separated) • `--yes`/`-y` (accept the default for every prompt) • `--overwrite` (replace existing `agentmark.json`) • positional folder name.
## Step 3: Ask your AI tool to wire AgentMark into your code
Open your project in Claude Code, Cursor, VS Code, or Zed and send the agent this message:
> **Set up AgentMark in this project, including the client and a deployable handler.**
The AgentMark skill takes over. It:
1. Detects your project's framework (Next.js, FastAPI, Hono, plain Node, etc.)
2. Queries the docs MCP for the right integration recipe
3. Proposes a concrete plan back to you: packages to install, where the client file goes, and what your first prompt looks like
4. After you confirm, installs the SDK, writes the client (`agentmark.client.ts` / `agentmark_client.py`), the dev entry that `agentmark dev` boots (`dev-entry.ts` / `.agentmark/dev_server.py`), and a deployable `handler` file, then scaffolds a first prompt and smoke-tests it
It **won't** touch your existing LLM-SDK call sites during setup. Migrating those is a separate confirmation, so ask the agent when you're ready.
## Step 4: Add your provider key
The agent tells you which env var to set for the model it picked. For OpenAI's `gpt-5.5` (the seeded default) that's:
```bash theme={null}
echo "OPENAI_API_KEY=sk-..." >> .env
```
**Verify your setup** at any point with [`agentmark doctor`](/reference/cli-commands#agentmark-doctor). It statically checks your config, prompts, client, and dependencies and flags the common silent failures (unregistered models, the `agentmarkPath: "/"` mistake, a missing client or dev-entry, an ungitignored `.env`) with a fix for each.
## Step 5: Run your first prompt
1. Commit and push your project to a Git repository (GitHub or GitLab).
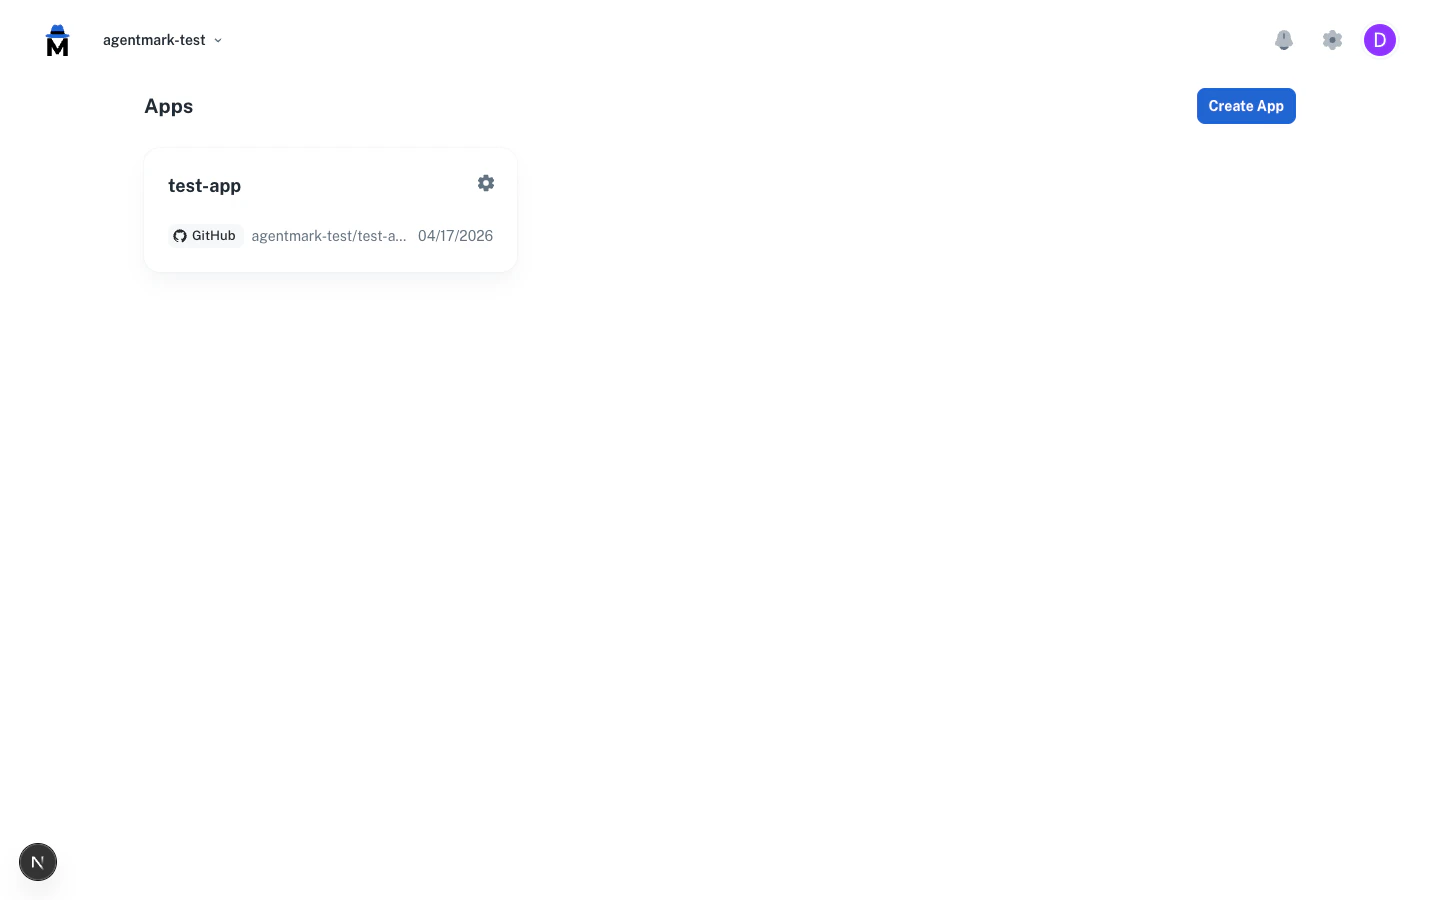
2. In the [AgentMark Dashboard](https://app.agentmark.co), click **Create App** and give it a display name (you can rename it later from the app's settings menu, and the URL identifier stays fixed). Then open the app's settings menu and choose **Link Repository** to pick your repo. The first time anyone in your organization connects a repo, you'll do a one-time **Connect Git Repository** step first. It installs the GitHub or GitLab app for your org. See [Deployment](/deploy/deployment) for the full flow.
3. Add your LLM provider API key in **Settings → Environment Variables**.
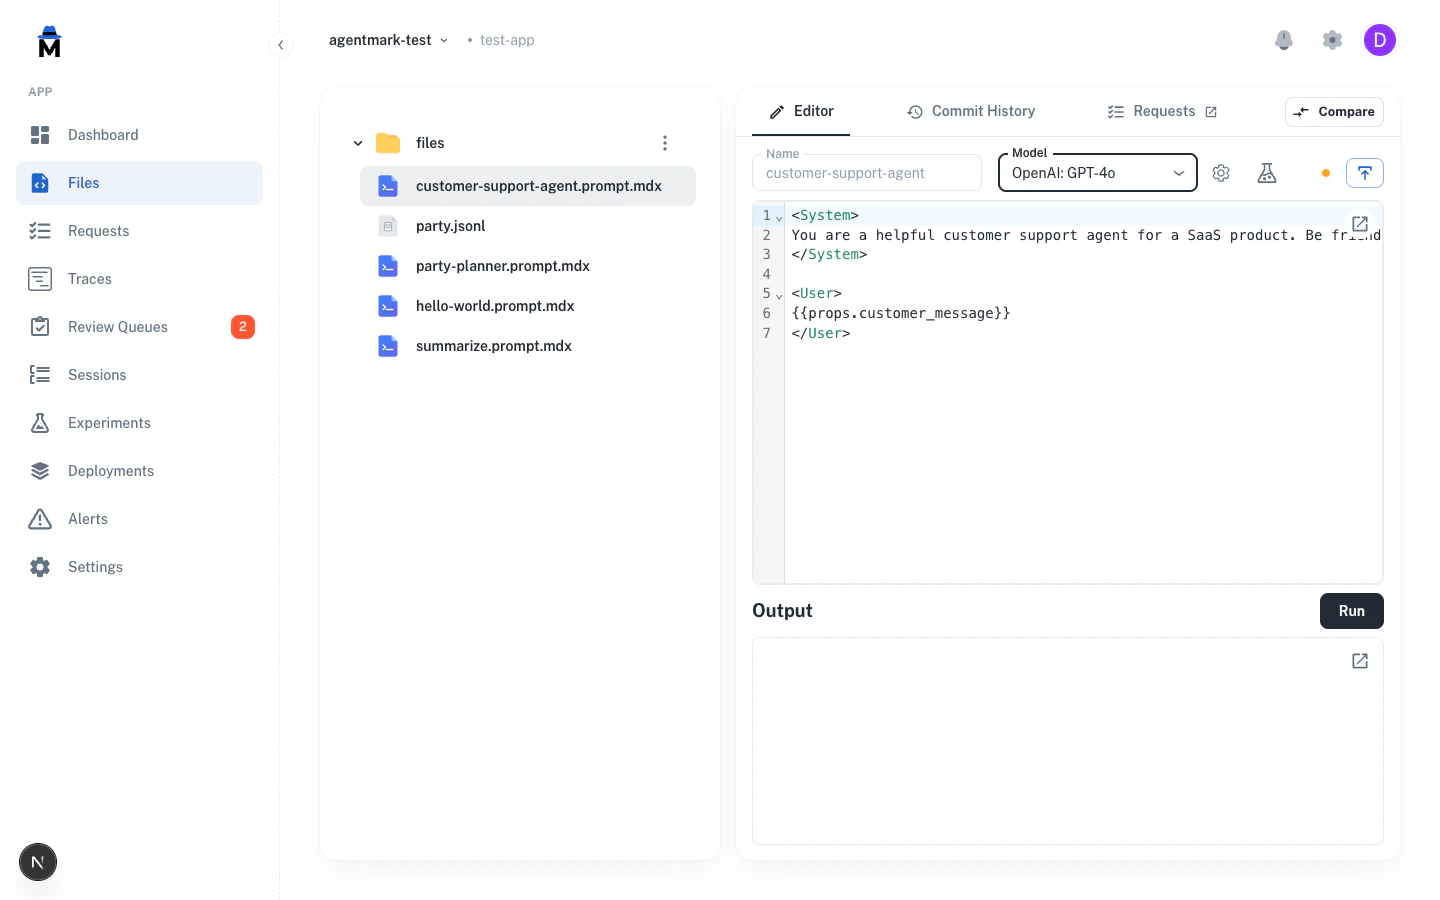
 Once connected, AgentMark Cloud syncs your prompts on every push. The **Run** button (and Experiments) stay disabled until a deployment of your handler exists; see [Client setup](/getting-started/client-setup) to add and deploy one. Then open a prompt and click **Run**, and output streams back in real time.
 Start the dev server (keep it running in a separate terminal). It boots your `dev-entry.ts` / `.agentmark/dev_server.py`; see [Client setup](/getting-started/client-setup) if you haven't created one yet:
```bash theme={null}
agentmark dev
```
Then run the prompt the agent scaffolded (the agent will tell you the actual path; substitute it for `` below):
```bash theme={null}
agentmark run-prompt agentmark/.prompt.mdx --props '{"message":"hello"}'
```
The CLI prints the model output, token counts (in/out/total), and a `📊 View trace` URL you can open in the browser to see the full span tree.
The dev server listens on ports `9418` (API), `9417` (webhook), and `3000` (UI app). Override with `--api-port` / `--webhook-port` / `--app-port` if you need different ports.
## Step 6: Run an experiment
An experiment runs a prompt against a dataset and scores each row.
Your datasets and score configs sync from the repo on every push. In the [AgentMark Dashboard](https://app.agentmark.co), open **Experiments**, click **New Experiment**, choose the prompt, dataset, and evaluations, then run. Results stream in live.
Start the dev server (keep it running in a separate terminal). It boots your `dev-entry.ts` / `.agentmark/dev_server.py`; see [Client setup](/getting-started/client-setup) if you haven't created one yet:
```bash theme={null}
agentmark dev
```
Then run the prompt the agent scaffolded (the agent will tell you the actual path; substitute it for `` below):
```bash theme={null}
agentmark run-prompt agentmark/.prompt.mdx --props '{"message":"hello"}'
```
The CLI prints the model output, token counts (in/out/total), and a `📊 View trace` URL you can open in the browser to see the full span tree.
The dev server listens on ports `9418` (API), `9417` (webhook), and `3000` (UI app). Override with `--api-port` / `--webhook-port` / `--app-port` if you need different ports.
## Step 6: Run an experiment
An experiment runs a prompt against a dataset and scores each row.
Your datasets and score configs sync from the repo on every push. In the [AgentMark Dashboard](https://app.agentmark.co), open **Experiments**, click **New Experiment**, choose the prompt, dataset, and evaluations, then run. Results stream in live.
 The experiment detail view shows each dataset row's input, the AI output, expected output, and evaluator scores, alongside aggregate metrics for the run (average score, latency, cost, tokens). See [Running experiments](/evaluate/running-experiments) for the full flow.
Add a `test_settings` block to your prompt's frontmatter pointing at a `.jsonl` dataset (see [Datasets](/evaluate/datasets) for the row shape), then:
```bash theme={null}
agentmark run-experiment agentmark/.prompt.mdx --threshold 80
```
The CLI runs every row, applies your evaluators, prints a results table, and **exits non-zero if pass rate is below `--threshold`**. Wire that into CI for prompt regression gating. The gate counts only evals that return a boolean `passed` (like the `exact_match` example in [Client setup](/getting-started/client-setup)); score-only evals don't feed it, so gate those with `test_settings.score_thresholds` instead.
The experiment detail view shows each dataset row's input, the AI output, expected output, and evaluator scores, alongside aggregate metrics for the run (average score, latency, cost, tokens). See [Running experiments](/evaluate/running-experiments) for the full flow.
Add a `test_settings` block to your prompt's frontmatter pointing at a `.jsonl` dataset (see [Datasets](/evaluate/datasets) for the row shape), then:
```bash theme={null}
agentmark run-experiment agentmark/.prompt.mdx --threshold 80
```
The CLI runs every row, applies your evaluators, prints a results table, and **exits non-zero if pass rate is below `--threshold`**. Wire that into CI for prompt regression gating. The gate counts only evals that return a boolean `passed` (like the `exact_match` example in [Client setup](/getting-started/client-setup)); score-only evals don't feed it, so gate those with `test_settings.score_thresholds` instead.
 The CLI prints a per-row results table with each item's evaluator scores, followed by the run's aggregate pass rate.
Need worked examples? See [Example prompts](/build/example-prompts) for four copy-paste recipes covering all four generation types (object, text+tools, image, speech).
## What's in your project after bootstrap
| File | Source | Purpose |
| ---------------------------------------------- | -------------------------- | ------------------------------------------------------------------------------------------------------------------------------------------------------------------------------------------------------------------------------------- |
| `agentmark.json` | CLI | Project config: `version`, `mdxVersion`, `agentmarkPath`, and one seeded model in `builtInModels` (plus `$schema`) at bootstrap. Add models with `agentmark pull-models`; `modelSchemas` and `scores` are optional keys you add later |
| `agentmark/.gitkeep` | CLI | Empty prompts directory (drop `.prompt.mdx` files here) |
| `.mcp.json` (and per-IDE configs) | CLI | MCP wiring: `agentmark-docs` (docs), `agentmark` (Cloud), `agentmark-local` (dev) |
| `.agents/skills/agentmark/` | CLI (via `npx skills add`) | Agent skill that knows AgentMark; teaches Claude Code / Cursor / etc. |
| `agentmark.client.ts` (or `_client.py`) | **Skill** | Configured SDK client, added when you ask the AI tool to integrate |
| `dev-entry.ts` (or `.agentmark/dev_server.py`) | **You / Skill** | Local webhook entry that `agentmark dev` boots; see [Client setup Step 3](/getting-started/client-setup) |
| `handler.ts` (or `handler.py`) | **You / Skill** | Cloud deployment entry; see [Client setup Step 4](/getting-started/client-setup) |
| Your first `.prompt.mdx` | **Skill** | Scaffolded by the AI tool, named for your use case |
| `.env` | **You** | Provider API key(s); `AGENTMARK_API_KEY` / `AGENTMARK_APP_ID` for Cloud |
The CLI ships **only** the unopinionated bits. Everything stack-specific comes from the AI tool reading your project plus the docs MCP, so the integration matches whatever framework you're already on.
## Next steps
Author `.prompt.mdx` files: text, object, image, speech
Copy-paste starters for all four generation types
Test prompts with datasets + evaluators; gate CI on regressions
Traces, sessions, cost-and-token tracking
Any SDK via the neutral render plus reference executors
Git-based deploys to AgentMark Cloud
The CLI prints a per-row results table with each item's evaluator scores, followed by the run's aggregate pass rate.
Need worked examples? See [Example prompts](/build/example-prompts) for four copy-paste recipes covering all four generation types (object, text+tools, image, speech).
## What's in your project after bootstrap
| File | Source | Purpose |
| ---------------------------------------------- | -------------------------- | ------------------------------------------------------------------------------------------------------------------------------------------------------------------------------------------------------------------------------------- |
| `agentmark.json` | CLI | Project config: `version`, `mdxVersion`, `agentmarkPath`, and one seeded model in `builtInModels` (plus `$schema`) at bootstrap. Add models with `agentmark pull-models`; `modelSchemas` and `scores` are optional keys you add later |
| `agentmark/.gitkeep` | CLI | Empty prompts directory (drop `.prompt.mdx` files here) |
| `.mcp.json` (and per-IDE configs) | CLI | MCP wiring: `agentmark-docs` (docs), `agentmark` (Cloud), `agentmark-local` (dev) |
| `.agents/skills/agentmark/` | CLI (via `npx skills add`) | Agent skill that knows AgentMark; teaches Claude Code / Cursor / etc. |
| `agentmark.client.ts` (or `_client.py`) | **Skill** | Configured SDK client, added when you ask the AI tool to integrate |
| `dev-entry.ts` (or `.agentmark/dev_server.py`) | **You / Skill** | Local webhook entry that `agentmark dev` boots; see [Client setup Step 3](/getting-started/client-setup) |
| `handler.ts` (or `handler.py`) | **You / Skill** | Cloud deployment entry; see [Client setup Step 4](/getting-started/client-setup) |
| Your first `.prompt.mdx` | **Skill** | Scaffolded by the AI tool, named for your use case |
| `.env` | **You** | Provider API key(s); `AGENTMARK_API_KEY` / `AGENTMARK_APP_ID` for Cloud |
The CLI ships **only** the unopinionated bits. Everything stack-specific comes from the AI tool reading your project plus the docs MCP, so the integration matches whatever framework you're already on.
## Next steps
Author `.prompt.mdx` files: text, object, image, speech
Copy-paste starters for all four generation types
Test prompts with datasets + evaluators; gate CI on regressions
Traces, sessions, cost-and-token tracking
Any SDK via the neutral render plus reference executors
Git-based deploys to AgentMark Cloud
Have questions?
Reach out any time: