Quickstart Choose your mode and follow the steps below.
Prerequisites
Node.js 18+
An LLM provider API key (OpenAI or Anthropic)
Step 1: Create Your Project npm create agentmark@latest -- --cloud
The CLI walks you through selecting your language, adapter, and IDE setup. Choose AgentMark Cloud as the deployment mode. You can skip the interactive prompts by passing flags directly: npm create agentmark@latest -- --cloud --typescript --adapter ai-sdk --client skip
Available flags: --typescript / --python, --adapter <name> (ai-sdk, claude-agent-sdk, mastra, pydantic-ai), --cloud / --self-host, --client <ide> (claude-code, cursor, vscode, zed, skip), --path <dir>, --api-key <key>. Step 2: Sync Your App
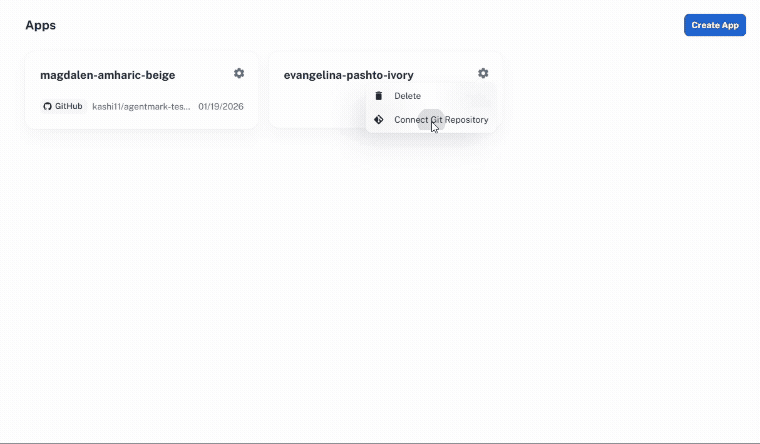
Commit and push your project to a Git repository
In the AgentMark Dashboard , navigate to your app
Add your LLM provider API key in Settings > Environment Variables
Connect your repository
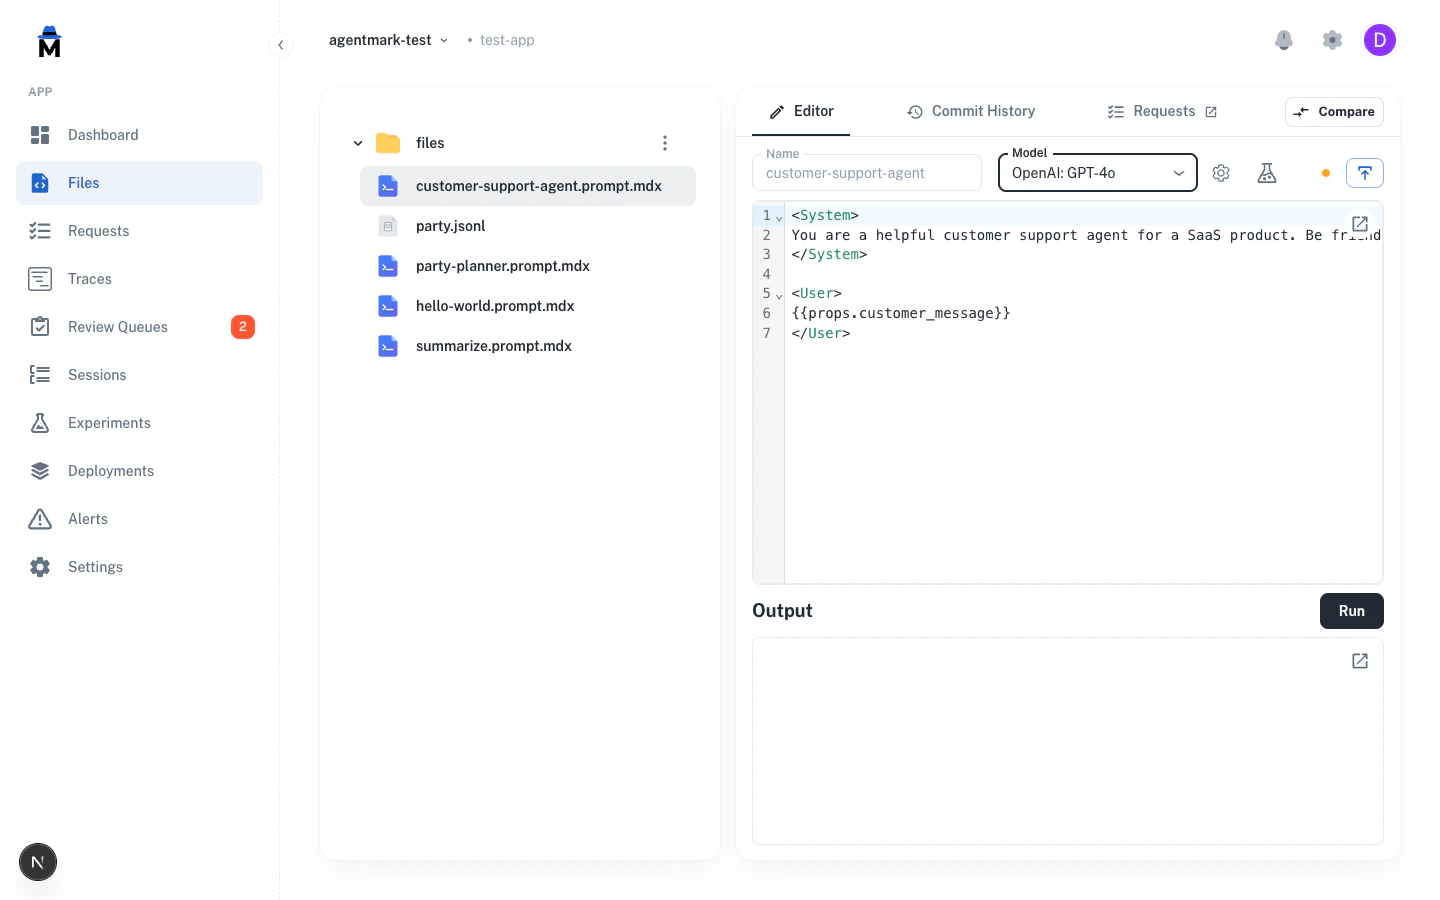
Once connected, the Dashboard syncs your prompt files and deploys your handler automatically. Step 3: Run Your First Prompt Open a prompt in the Dashboard and click Run . The platform executes it on your deployed handler and streams results back in real time. Step 4: Run an Experiment Experiments test a prompt against a dataset and score the results with evaluators. Your project includes an example dataset and prompt ready to go.
Navigate to the party-planner prompt in the Dashboard
Open the Experiments tab
Click Run Experiment
Review the results — scores, pass rates, and individual outputs
Step 5: View Your Traces Every prompt and experiment execution is automatically traced. Navigate to the Traces page to see the full execution timeline — input/output, token usage, cost, and latency. Step 1: Create Your Project npm create agentmark@latest
The CLI walks you through selecting your language, adapter, deployment mode, and IDE setup. You can skip the interactive prompts by passing flags directly: npm create agentmark@latest -- --self-host --typescript --adapter ai-sdk --client skip
Available flags: --typescript / --python, --adapter <name> (ai-sdk, claude-agent-sdk, mastra, pydantic-ai), --cloud / --self-host, --client <ide> (claude-code, cursor, vscode, zed, skip), --path <dir>, --api-key <key>. Step 2: Start the Dev Server cd my-agentmark-app npx agentmark dev
cd my-agentmark-app
npx agentmark dev
Step 3: Run Your First Prompt Your project comes with example prompts ready to go. npx agentmark run-prompt agentmark/customer-support-agent.prompt.mdx
Step 4: Run an Experiment Experiments test a prompt against a dataset and score the results with evaluators. Your project includes an example dataset and prompt ready to go. npx agentmark run-experiment agentmark/party-planner.prompt.mdx
The CLI runs every item in the dataset, applies your evaluators, and outputs a results table: Step 5: View Your Traces Every prompt and experiment execution is automatically traced. Open http://localhost:3000 and navigate to Traces to see your execution history with span trees, input/output, and timing. What’s in Your Project File / Directory Purpose agentmark/Prompt templates (.prompt.mdx) and test datasets (.jsonl) agentmark.client.tsClient configuration — models, tools, and loader setup agentmark.jsonProject configuration (models, scores, schema) agentmark.types.tsAuto-generated TypeScript types for your prompts handler.tsHandler for cloud deployment (Cloud mode only) dev-entry.tsDevelopment server entry point (customizable) index.tsExample application entry point .envEnvironment variables (API keys)
File / Directory Purpose agentmark/Prompt templates (.prompt.mdx) and test datasets (.jsonl) agentmark_client.pyClient configuration — models, tools, and loader setup agentmark.jsonProject configuration (models, scores, schema) .agentmark/dev_server.pyDevelopment server entry point main.pyExample application entry point pyproject.tomlPython project dependencies .envEnvironment variables (API keys)
Next Steps
Build Prompts Create prompts with tools, structured output, and components
Evaluate Test your prompts with datasets and automated evaluators
Observe Monitor traces, sessions, and costs in production
Integrations Connect with Vercel AI SDK, Pydantic AI, Mastra, and more
Have Questions? We’re here to help! Choose the best way to reach us: